Drupal 7 - Easily add images in your articles with IMCE
lun, 04/06/2015 - 17:52 — geek17Introduction
This article presents the IMCE module to easily manage and insert images inside your articles.
IMCE main features:
- upload images from your hard drive to your webserver
- Image(jpg, png, gif) operations: resize, create thumbnails, preview
- navigate inside the structure of your web server to select image
Warning: CKEditor must be installed on your Drupal to use IMCE
By default, Drupal allows only to associate one image to one article.
But usually it is quite convenient to insert images inside article to illustrate our explanations.
The CKEditor module provides the ability to add images in the articles, but as you can see below, you must enter the URL of the image.
It is not possible to directly upload or select inside a folder of the web server.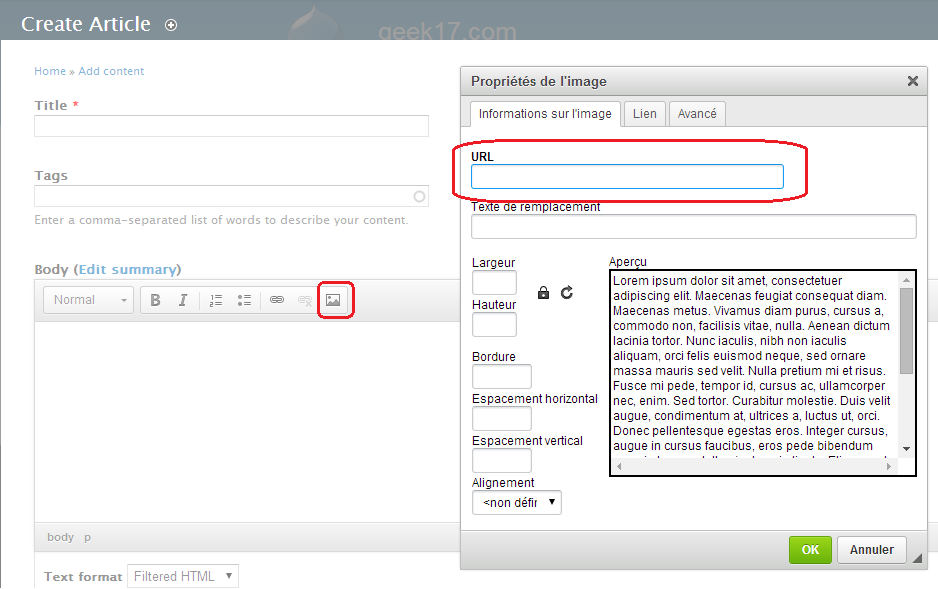
To helps in the management of images, we will install the IMCE module.
Installation & configuration
First download the module at the following address: https://www.drupal.org/project/IMCE
Then unzip the contents of the archive in the modules folder of your Drupal wesite site\all\modules
Finally, enable the module in the Drupal administration page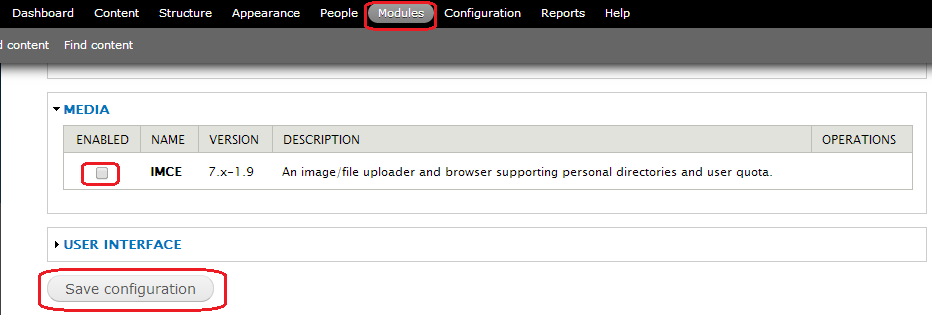
It is now necessary to configure CKEditor to use our IMCE module to manage images.
From the Drupal Configuration page, select CKEditor and click on the "Edit" link of the "Advanced" Profile.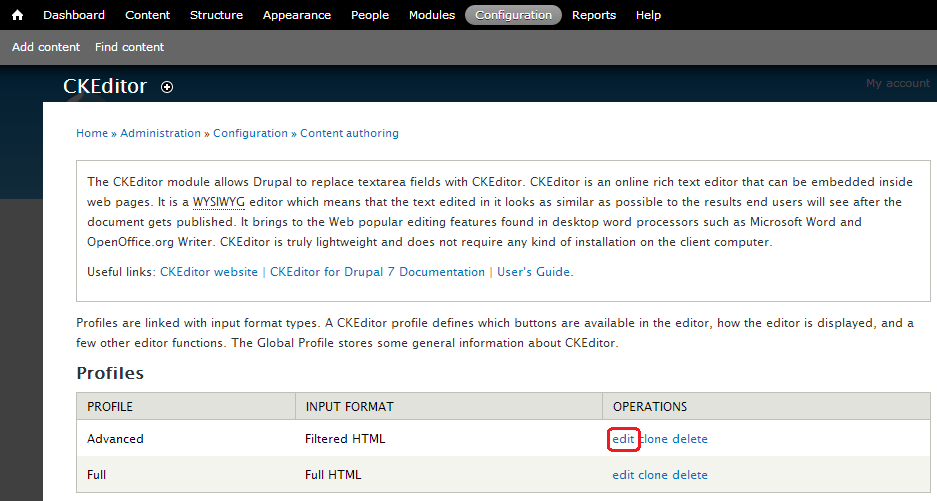
Then open the "File Browser settings" area at the bottom of the window.
And select "IMCE" in the 2 drop-down lists below to ask CKEdtor to use ICME module when images are needed.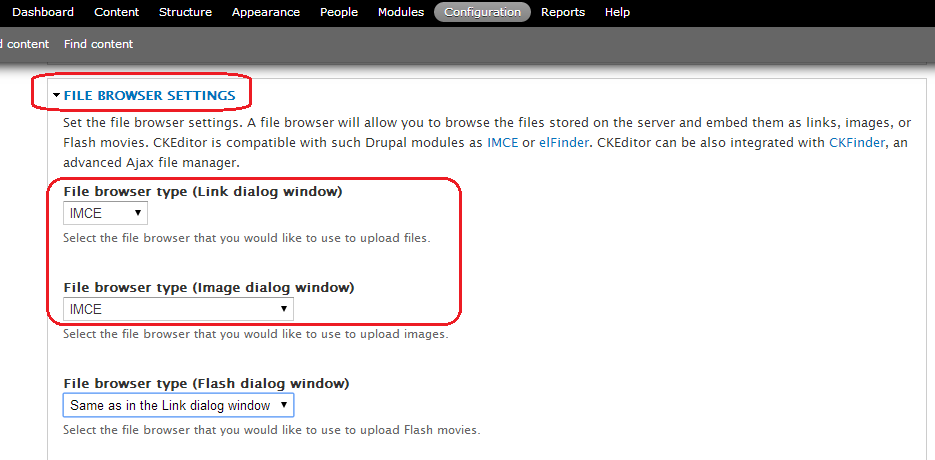
As usual, don't forget to save your changes with the "Save" button at the bottom of the page.
Then repeat the same operation for the "Full HTML" profile of CKeditor: IMCE will be active in two profiles.
How to use
Now, if you add or edit article, and you use the "Insert Image" icon from the CKEditor toolbar, you'll see a new "Server Explorer" button next to the URL the image to add.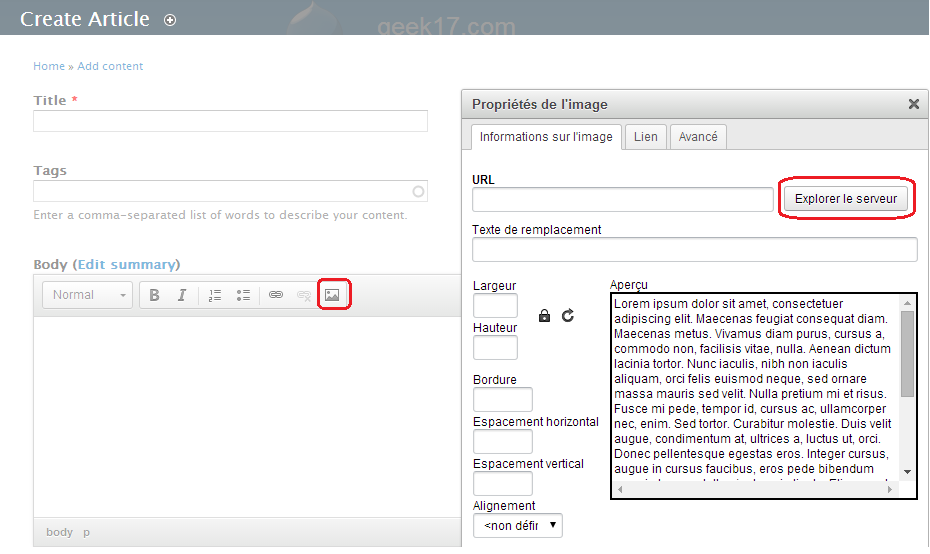
Click on the "Browse Server" button to open the window below.
Then click the "Upload" button at the top left to send a image file to your web server.
Select an image on your hard drive and click "Upload".
You will notice that it is possible to automatically resize image to create thumbnail.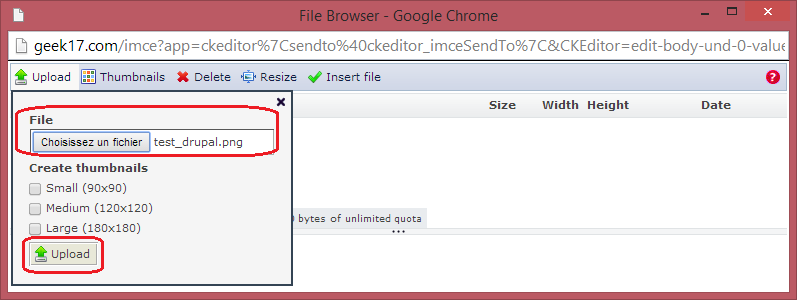
Your image is now available on your web server.
It was copied to the sites\default\files folder of your webserver
Now click on the "Insert File" button to add it to your article.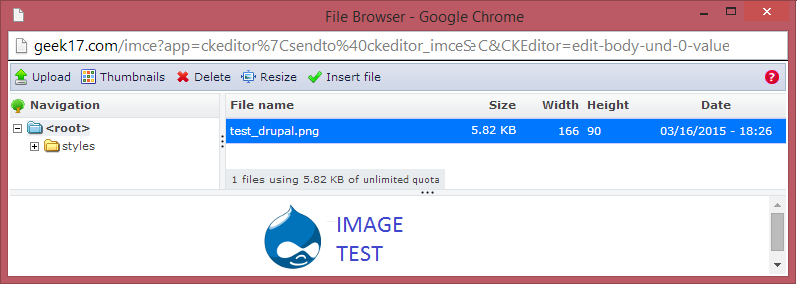
You will see that the URL is automatically filled and the preview of our image appears.
It only remains to validate to insert the image in your article.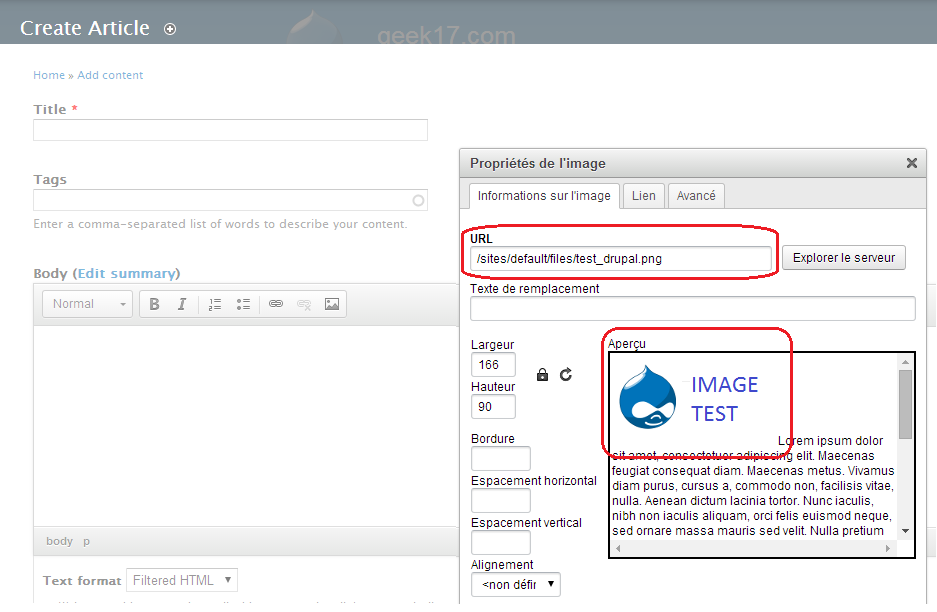
It is possible to insert as many images as you want in article.
You can also transfer manually via FTP a folder containing images on your server in the folder sites\default\files
This files will be displayed in the IMCE window and you can add these images in your articles.
